

If you're experiencing issues with a control valve on your heavy equipment, you may be able to save time and money by repairing it with an oil seal kit. These kits contain all the necessary components to repair leaking control valves, including o-rings, seals, and gaskets. By repairing the valve with a seal kit, you can avoid the cost and downtime associated with replacing the entire valve.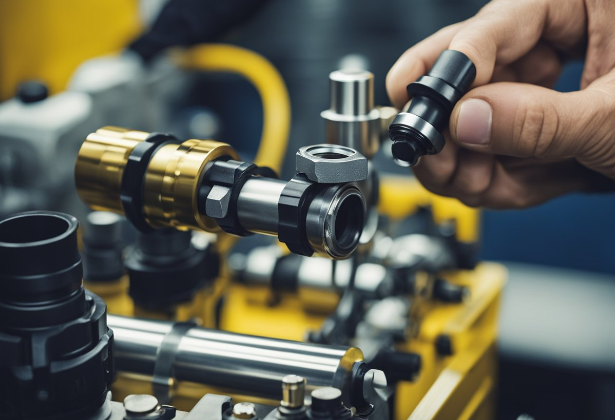
Oil seal kits are available for a wide variety of heavy equipment, including excavators, bulldozers, and loaders. They are designed to fit specific models and brands of equipment, so it's important to ensure that you select the correct kit for your machine. In addition to repairing leaking valves, oil seal kits can also be used to address other issues, such as poor performance or reduced efficiency.
Repairing a control valve with an oil seal kit can be a straightforward process, but it's important to follow the manufacturer's instructions carefully to ensure that the repair is done correctly. In some cases, it may be necessary to disassemble the valve to access the damaged components. If you're not comfortable performing the repair yourself, it's best to consult with a qualified technician who can help you get your equipment back up and running as quickly as possible.
Overview of Control Valve Repair
When it comes to maintaining the optimal performance of your control valve, regular repair and maintenance are essential. Repairing your control valve can save you from the cost of buying a new valve, and it can also help you to avoid potential safety hazards.
Significance of Oil Seal Kits in Control Valves
One of the most important components of a control valve is the oil seal kit. The oil seal kit helps to prevent leakage of fluid from the valve, which can lead to reduced control valve performance and even system failure. Oil seal kits are designed to provide a tight seal around the valve stem, preventing fluid from leaking out of the valve.
When repairing a control valve, it is important to choose the right oil seal kit for your valve. Using the wrong oil seal kit can lead to further damage to your valve and even system failure. Therefore, it is essential to consult with a professional to determine the right oil seal kit for your control valve.
Common Issues with Control Valve Seals
Control valve seals are subject to wear and tear over time, which can lead to reduced valve performance. Some of the common issues with control valve seals include:
- Leaks: Leaks can occur when the oil seal kit is damaged or worn out. This can lead to reduced valve performance and even system failure.
- Sticking: Sticking can occur when the valve stem becomes stuck in the valve body due to debris or corrosion. This can prevent the valve from opening or closing properly, leading to reduced valve performance.
- Wear and tear: Control valve seals are subject to wear and tear over time, which can lead to reduced valve performance. This can be caused by factors such as high pressure, high temperature, and corrosive fluids.
In conclusion, regular repair and maintenance of your control valve is essential to maintaining its optimal performance. The oil seal kit is an important component of the control valve, and choosing the right oil seal kit is essential to preventing system failure. By understanding the common issues with control valve seals, you can take steps to prevent them and ensure the optimal performance of your control valve.
Components of Oil Seal Kits
When it comes to repairing control valves, oil seal kits are essential components. These kits contain various types of seals and materials that are used to prevent hydraulic fluid from leaking out of the valve. In this section, we will discuss the different components of oil seal kits.
Types of Seals in the Kit
Oil seal kits typically include several types of seals that are used for different purposes. The most common types of seals found in these kits are:
- O-rings: These are circular seals that are used to prevent fluid from leaking out of the valve. O-rings are made from a variety of materials such as rubber, silicone, and nitrile.
- Piston seals: These seals are used to prevent hydraulic fluid from leaking past the piston in the valve. Piston seals are typically made from materials such as polyurethane, nitrile, or PTFE.
- Rod seals: These seals prevent fluid from leaking past the rod of the valve. Rod seals can be made from materials such as polyurethane, nitrile, or PTFE.
- Wiper seals: These seals are used to prevent dirt and other contaminants from entering the valve. Wiper seals are typically made from materials such as polyurethane or nitrile.
Materials Used in Oil Seals
Oil seals are made from a variety of materials, depending on the application. Some of the most common materials used in oil seals include:
- Rubber: This is a common material used for O-rings and other seals. Rubber is flexible and can withstand a wide range of temperatures.
- Polyurethane: This material is used for piston and rod seals because it is durable and can withstand high pressure.
- Nitrile: This material is used for O-rings, piston seals, and rod seals. It is resistant to oil and other fluids.
- PTFE: This material is used for piston and rod seals because of its low friction properties and resistance to high temperatures.
In conclusion, oil seal kits contain various types of seals and materials that are used to repair control valves. Understanding the different components of these kits is essential for anyone involved in valve repair.
Step-by-Step Repair Process
Repairing a control valve oil seal kit can be a straightforward process if you follow the right steps. Here is a step-by-step guide to help you repair your control valve oil seal kit.
Disassembly of the Control Valve
The first step in repairing your control valve oil seal kit is to disassemble the valve. Start by removing the valve from the process line and then remove the valve bonnet and unscrew the stem nut from the stem.
Next, remove the actuator and positioner from the valve body. Once you have removed these parts, you can then remove the valve stem and the valve plug.
Inspection and Cleaning
After disassembling the control valve, you need to inspect and clean all the components. This is an important step in the repair process. Remove debris, rust, and contaminants from all the components, including the valve body, valve plug, and stem.
Inspect all the parts for damage or wear, including the valve seat, valve plug, and stem. If any of the parts are damaged or worn, replace them with new ones.
Replacement of the Oil Seal
The next step is to replace the oil seal. Remove the old oil seal from the valve stem and replace it with a new one. Ensure that the new oil seal is properly installed and seated in the valve stem.
Reassembly and Testing
Once you have replaced the oil seal, you can then reassemble the control valve. Start by reattaching the valve plug and stem to the valve body.
Next, reattach the actuator and positioner to the valve body. Once you have reassembled the valve, you can then test it to ensure that it is working properly.
In conclusion, repairing a control valve oil seal kit requires a step-by-step process that includes disassembly, inspection and cleaning, replacement of the oil seal, and reassembly and testing. By following these steps, you can ensure that your control valve is functioning properly and efficiently.
Troubleshooting Common Seal Installation Issues
Leakage Post-Repair
After repairing a control valve, you may notice oil leaking from the seal. This could be due to several reasons, such as improper installation or damage to the seal during installation. Here are some troubleshooting tips to help you address this issue:
- Check the seal for damage: Before installing the seal, inspect it for any cracks, tears, or other damage. If the seal is damaged, it will not create a proper seal and will leak oil.
- Verify proper installation: Ensure that the seal is installed correctly and is seated properly. If the seal is not installed correctly, it will not create a proper seal and will leak oil.
- Check the valve stem: If the valve stem is worn or damaged, it can cause the seal to leak. Inspect the valve stem for any signs of wear or damage and replace it if necessary.
Seal Misalignment
Another common issue that can occur during seal installation is misalignment. This can lead to the seal not creating a proper seal and oil leakage. Here are some troubleshooting tips to help you address this issue:
- Check the seal for proper fit: Make sure that the seal is the correct size for the valve stem. If the seal is too big or too small, it will not create a proper seal and will leak oil.
- Verify proper installation: Ensure that the seal is installed correctly and is seated properly. If the seal is not installed correctly, it can become misaligned and will not create a proper seal.
- Check the valve stem: If the valve stem is bent or misaligned, it can cause the seal to become misaligned. Inspect the valve stem for any signs of damage or misalignment and replace it if necessary.
By following these troubleshooting tips, you can address common seal installation issues and ensure that your control valve repair is successful.
Maintenance Tips for Longevity of Oil Seals
Oil seals are an important part of the control valve repair kit and play a crucial role in preventing oil leaks. To ensure the longevity of oil seals, you need to follow a few maintenance tips. Here are some tips that can help you maintain oil seals in good condition:
Use the Right Type of Oil Seal
Using the right type of oil seal is crucial for the longevity of oil seals. Make sure you choose the correct oil seal for your application. Using the wrong type of oil seal can cause leaks and damage to the control valve.
Proper Installation
Proper installation is key to the longevity of oil seals. Make sure you install the oil seals correctly to prevent damage. Follow the manufacturer's instructions carefully, and use the right tools to install the oil seals.
Regular Maintenance
Regular maintenance is important to keep oil seals in good condition. Check the oil seals regularly for signs of wear and damage. Replace oil seals as soon as you notice any signs of wear or damage.
Keep the Area Clean
Keeping the area around the oil seals clean is important to prevent contamination. Dirt and debris can cause damage to the oil seals and reduce their lifespan. Clean the area around the oil seals regularly to prevent contamination.
Check Oil Levels
Checking oil levels regularly is important to prevent oil leaks. Low oil levels can cause the oil seals to wear out quickly and reduce their lifespan. Make sure you check the oil levels regularly and top up the oil as needed.
By following these maintenance tips, you can ensure the longevity of oil seals and prevent oil leaks. Regular maintenance and careful installation can help you avoid costly repairs and downtime.